
Introducing Characters
Now, let's introduce characters into the game.
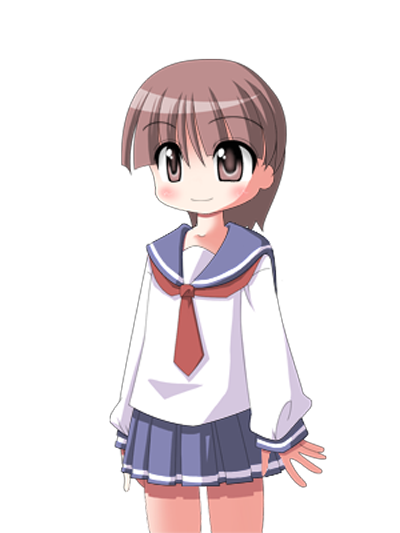
We will add two characters. Save the images as "yuko1.png" and "haruko1.png" inside the fgimage folder of your project.
Note: Please use image files with a transparent background.
Character Images: yuko1.png & haruko1.png

Now, let's write the script to introduce both characters.
*start

; Execute background image change
[bg storage=room.jpg time=3000]

The background has changed.

; Introduce the first character
[chara_new name="yuko" storage="yuko1.png" jname="YUKO"]
[chara_show name="yuko"]
Yuko has appeared![l][r]

; Introduce the second character
[chara_new name="haruko" storage="haruko1.png" jname="HARUKO"]
[chara_show name="haruko"]
Haruko has appeared![l][r]
Save and execute the script.
Execution Result:
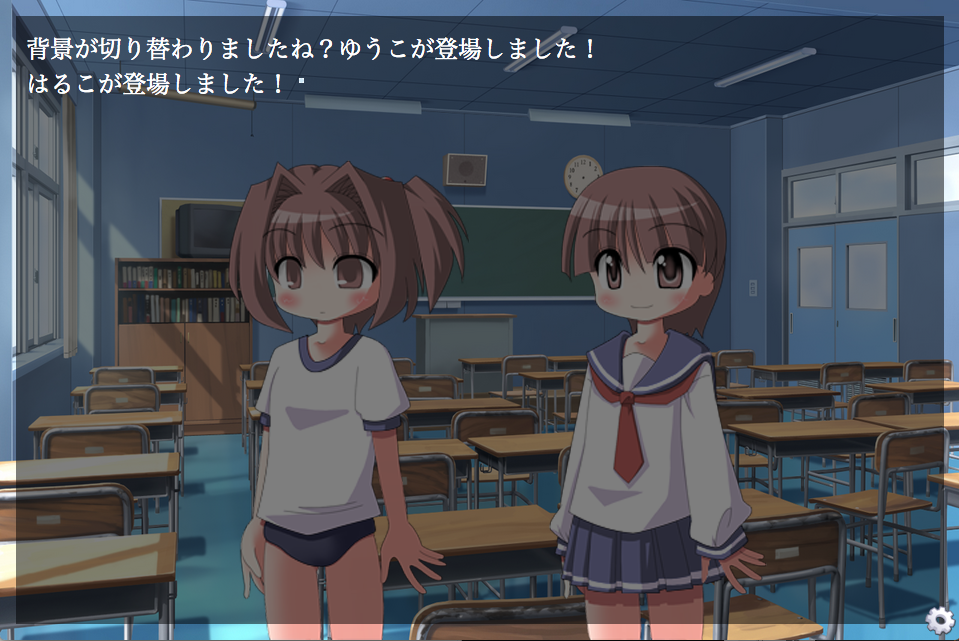
The characters are now displayed on the screen.
Now, let's go through how this works.
[chara_new name="yuko" storage="yuko1.png" jname="YUKO"]
[chara_show name="yuko"]
The [chara_new] tag is used to define a character.
Each character must be defined once before appearing in the game.
The attributes are as follows:
- name: The character's internal name (use alphanumeric characters).
- storage: Specifies the image file to display.
- jname: Registers the character's name in Japanese.
Finally, the [chara_show] tag is used to display the character.
The character specified in the name attribute appears on the screen.
Changing Character Expressions
Changing a character’s facial expression based on dialogue makes the game more engaging.
TyranoScript supports this feature.
Let's prepare a new expression for Yuko.
Save the file as "yuko2.png" inside the fgimage folder.
Character Expression Image:
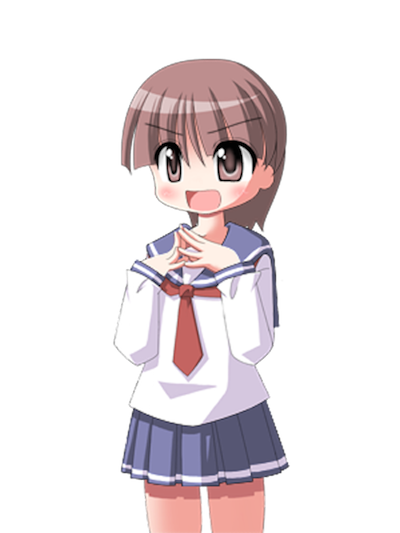
This expression looks slightly angry.
Now, let’s update our script to change her expression during the game.
*start

; Introduce the first character
[chara_new name="yuko" storage="yuko1.png" jname="YUKO"]
[chara_show name="yuko"]

Yuko has appeared![l][r]

; Introduce the second character
[chara_new name="haruko" storage="haruko1.png" jname="HARUKO"]
[chara_show name="haruko"]

Haruko has appeared![l][r]

; Register Yuko's expression
[chara_face name="yuko" face="angry" storage="yuko2.png"]

Changing expression[p]
; Change Yuko's expression
[chara_mod name="yuko" face="angry"]

Restoring expression[p]
; Revert Yuko's expression
[chara_mod name="yuko" face="default"]
Save and execute the script.
Execution Result:
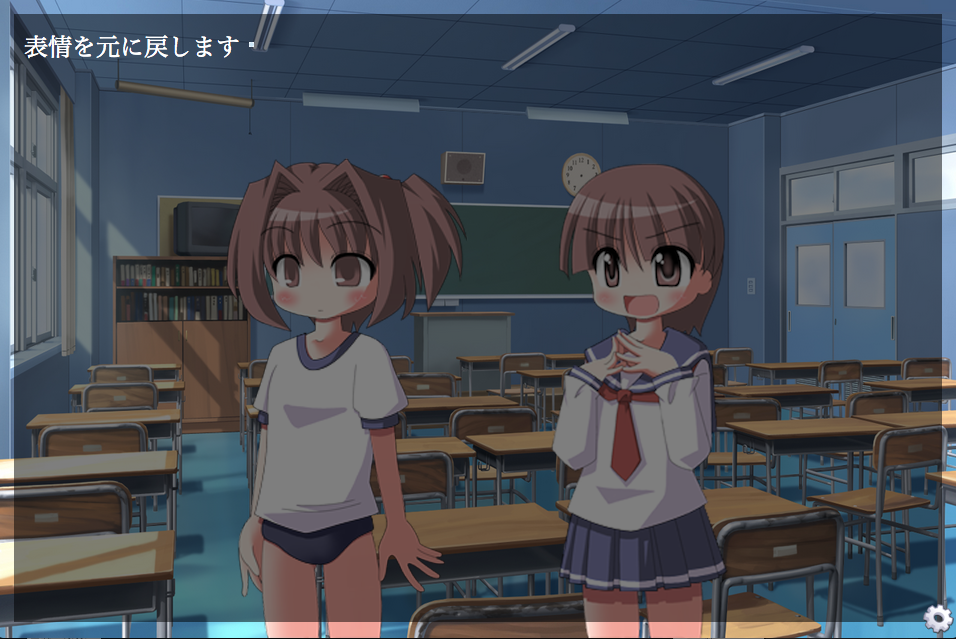
The character’s expression has changed!
The [chara_face] tag associates a new expression with a character that was defined using [chara_new].
In this case, we made the "angry" expression available for Yuko.
This line changes Yuko’s expression to "angry", which was registered earlier with [chara_face].[chara_mod name="yuko" face="angry"]
This restores Yuko’s original expression.[chara_mod name="yuko" face="default"]
The "default" expression refers to the initial expression registered with [chara_new].
By using this method, you can efficiently manage character expressions to enhance storytelling.
>> Next: "Branching with Choices"
Support Sites
Contact Us
Email: shikemokumk@gmail.com
2016 © STRIKEWORKS All Rights Reserved.