Character Parts Variation Feature
*This feature requires TyranoScript V470_rc4 or later.
In the past, when creating variations in character expressions, you needed a separate image file for each variation.
However, with the **character parts layering feature** in TyranoScript, you can combine multiple image layers to express various facial and costume patterns.
For example, if you have 3 clothing styles, 5 facial expressions, and 5 hairstyles, you'd need 75 image files to express all combinations the old way.
With this new feature, you can combine only the necessary parts at runtime, meaning you only need 13 image files.
This significantly reduces your game’s storage size and improves performance. Be sure to make use of it!
Prepare the Character and Part Images
We’ll be using the character assets from the following link for this tutorial. Please download them:
Character Nanka Maker (キャラクターなんとか機)

In the downloaded archive, you'll find a folder named `data/default`, which contains the character parts.
Make sure all these images are transparent PNGs of the **same size**. They will be stacked to form a complete character.
For the following examples, please rename the `default` folder to `yuko`, and place it like this: data/fgimage/chara/yuko
Define and Display Character Parts
- [chara_layer] — Defines the character parts (layers).
- [chara_part] — Applies specific expressions using the defined parts.
- [chara_part_reset] — Resets all parts back to their default states.
For example: clothing, hairstyle, eyes, mouth, etc.—you should define the parts you want to separate.
However, using too many parts can slow down performance, so more isn’t always better.
To begin, just like when displaying a normal character, use the [chara_new] tag to define the character.
The only difference is that now you must set the **base image** (the image furthest back in the layer stack) in the `storage` attribute.
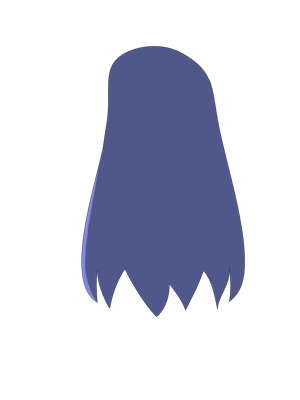
; Register the character
[chara_new name="yuko" storage="chara/yuko/hair_back/long.png" jname="Yuko" ]
This file becomes the base image upon which all parts will be layered.
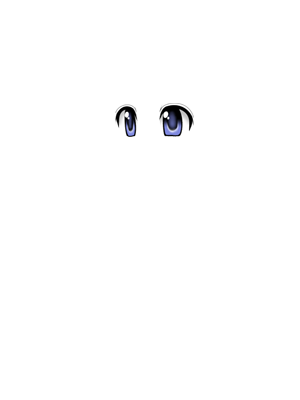
Next, define the parts that will be layered on top. For example, to register eye parts:
; Eye variation parts

[chara_layer name="yuko" part="eye" id="1" storage="chara/yuko/eye/normal_eyes_black1.png" zindex=20 ]

[chara_layer name="yuko" part="eye" id="2" storage="chara/yuko/eye/deformed_eyes1.png" ]
The [chara_layer] tag is used to define variation parts.
In this case, we are adding two eye variations for the character "yuko."
The attribute part="eye" tells the system that these are different "eye" expressions.
The id="1" assigns an identifier that you’ll use later when switching expressions.
The ID doesn’t have to be a number—feel free to use readable names.
To actually change the variation later, use the [chara_part] tag:
; Change eye variation part

[chara_part name="yuko" eye="2" ]
Here, you specify the part name and the ID you want to apply.
You can also change multiple parts at once. For example, if you also defined a "mouth" (mouse) part:
; Change eye and mouth variation parts

[chara_part name="yuko" eye="2" mouse="3" ]
As shown above, changing multiple parts at the same time is very easy.
Here’s a full code sample that shows how to display a character using variation parts.
;Create character
[chara_new name="yuko" storage="chara/yuko/hair_back/long.png" jname="Yuko" ]
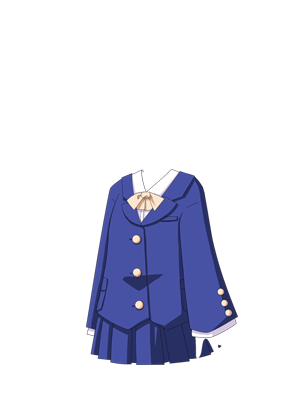
;Body parts
[chara_layer name="yuko" part="body_back" id="breza" storage="chara/yuko/body_back/breza1.png" zindex=9 ]
[chara_layer name="yuko" part="body_front" id="breza" storage="chara/yuko/body_front/breza1.png" zindex=10 ]
;Eye parts
[chara_layer name="yuko" part="eye" id="1" storage="chara/yuko/eye/black1.png" zindex=20 ]
[chara_layer name="yuko" part="eye" id="2" storage="chara/yuko/eye/default1.png" ]
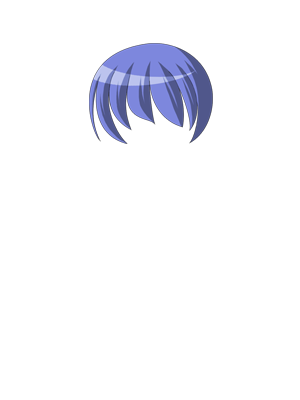
;Hairstyle parts
[chara_layer name="yuko" part="hair_front" id="Natural" storage="chara/yuko/hair_front/natural.png" zindex=40 ]
[chara_layer name="yuko" part="hair_front" id="Wavy" storage="chara/yuko/hair_front/colored.png" ]
;Head parts
[chara_layer name="yuko" part="head" id="1" storage="chara/yuko/head/normal1.png" zindex=11]
[chara_layer name="yuko" part="head" id="2" storage="chara/yuko/head/blue1.png" ]
;Facial expression parts
[chara_layer name="yuko" part="face" id="1" storage="chara/yuko/face_front/normal.png" zindex=20 ]
[chara_layer name="yuko" part="face" id="2" storage="chara/yuko/face_front/surprise.png"]
;Accessory parts
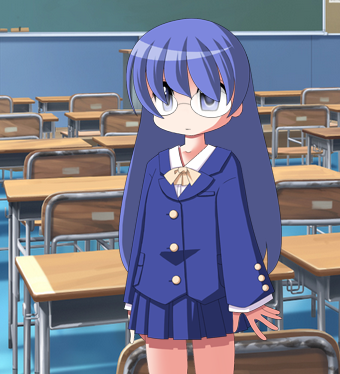
[chara_layer name="yuko" part="megane" id="0" storage="none" zindex=30 ]
[chara_layer name="yuko" part="megane" id="1" storage="chara/yuko/accessory_front/glasses.png"]
;Display character
[chara_show name="yuko"]
When you run the script, the character will be displayed.
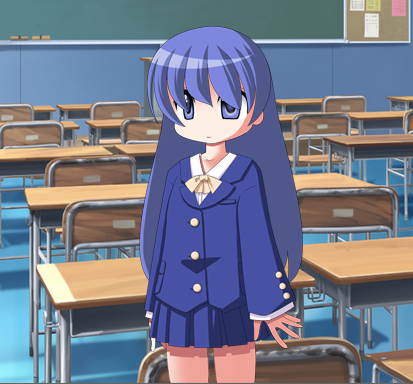
How is it so far? Let's move on to switching character parts.
;Change hairstyle and expression

[chara_part name="yuko" hair_front="colored" face="2" ]
The switch is done.
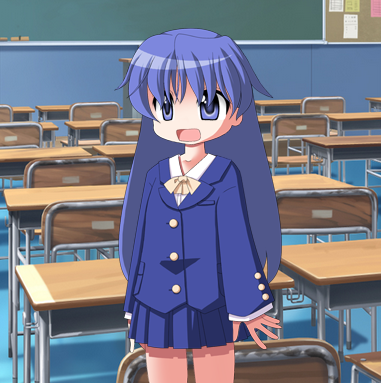
Easy, right?
Even when using the character part switching feature, all character-related functions such as animation and emphasis effects are still available.
Let's go over a few important things next.
zindex Parameter – Determines Layer Order
When defining character parts using the [chara_layer] tag, we used the zindex parameter.
[chara_layer name="yuko" part="eye" id="1" storage="black1.png" zindex=20 ]
This determines which parts appear in front when overlapping. Higher numbers appear in front.
You only need to define zindex the first time you register a part. It will be used for all parts with the same name.
Default Values for Parts
The first registered part using [chara_layer] becomes the default.
;Eye parts

[chara_layer name="yuko" part="eye" id="1" storage="black1.png" zindex=20 ]

[chara_layer name="yuko" part="eye" id="2" storage="normal1.png" ]
In this case, the first id="1" is the default.
Default parts are shown when [chara_show] is used.
Why does this matter? Because after using [chara_hide] to remove a character, when you show it again, previous part states are remembered.
You could reset manually using [chara_part], but it’s a bit tedious.
That's where the [chara_part_reset] tag comes in—it resets to the default parts easily.
A very useful feature is that you can reset only specific parts. Take a look:
[chara_part_reset name="yuko" part="face" ]
This resets only the face part to default. You can also specify multiple parts by separating them with commas:
[chara_part_reset name="yuko" part="face,mouse,eye" ]
*If part is not specified, all parts will be reset to their default values.
Parts Hidden at First and Shown Later
Sometimes you may want a part like accessories to be hidden initially and shown later using part switching.
You can achieve this as follows:
;Accessory parts

[chara_layer name="yuko" part="megane" id="on" storage="none" zindex=30 ]

[chara_layer name="yuko" part="megane" id="off" storage="glasses.png"]
The first [chara_layer] is the default, and it uses storage="none".
This lets you define an invisible part initially. Then later:
[chara_part name="yuko" megane="あり" ]
The accessory part is now added!
For more details, check the tag reference.
Support Sites
Contact Us
Email: shikemokumk@gmail.com
2016 © STRIKEWORKS All Rights Reserved.