Script Converter
>> Learn more about the PRO version
This feature allows you to automatically convert plain text scenario files into script format.
In visual novel development, many creators start by writing out the text in a simple format. This tool helps by automatically inserting TyranoScript tags based on defined rules.
The rules you create can be exported and used in other environments, making this feature useful for collaborative development as well.
Please give it a try.
Defining Rules
From the left menu, go to “Others” → “Script Converter”.
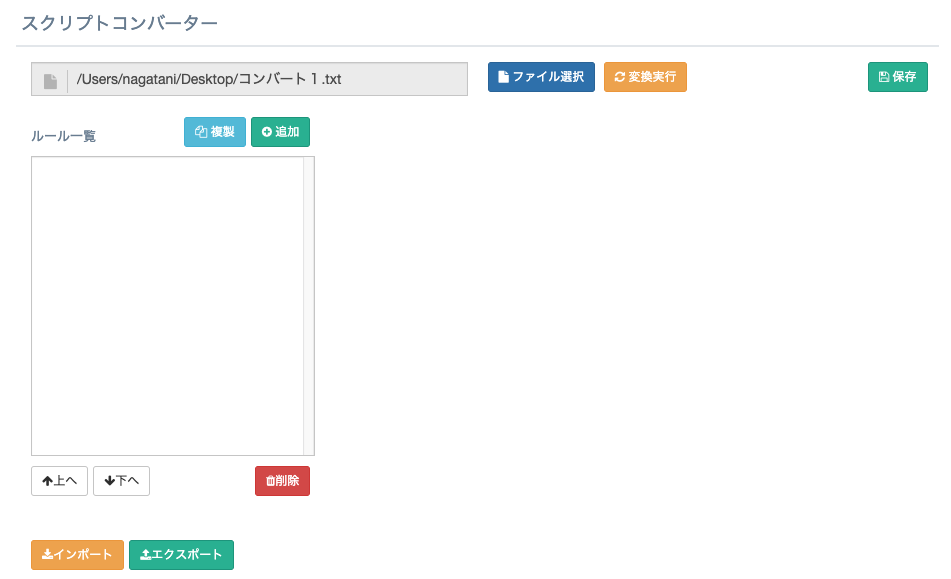
This opens the script converter screen.
Next, prepare the text file to convert.
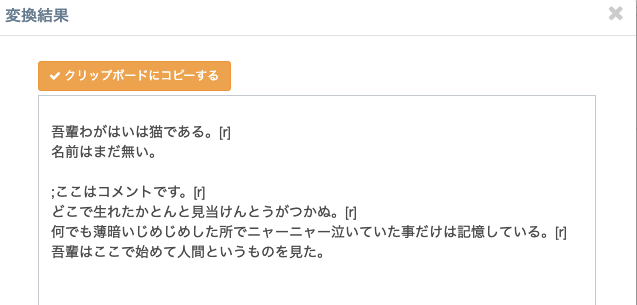
We'll use the following content for this example:
					I am a cat.

					I don't have a name yet.


					;This is a comment.

					I have no idea where I was born.

					All I remember is meowing in a dark, damp place.

					That's where I first saw a human being.
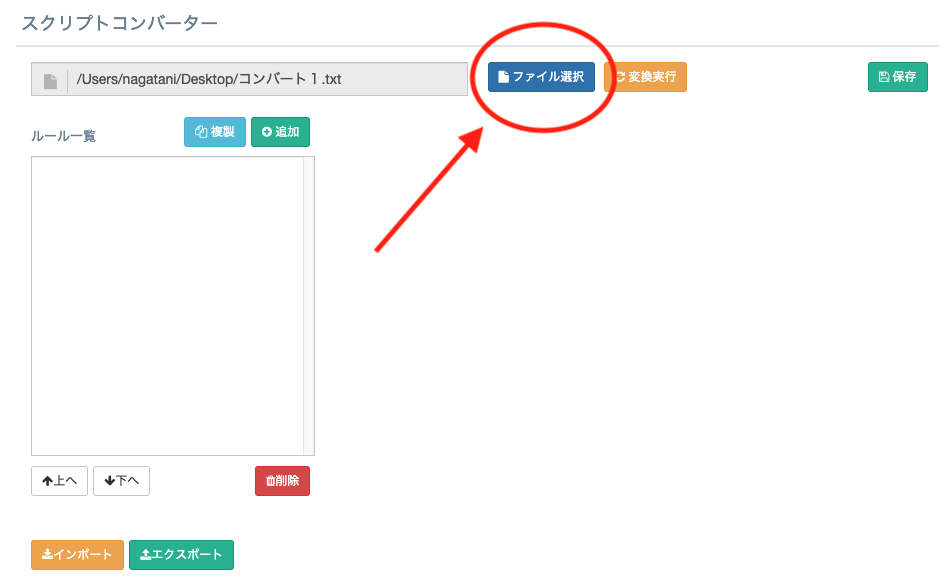
Select the above text file using the file selection option.
Defining a Rule
The converter allows you to define rules and apply them only under certain conditions.
It might sound complicated, but once you try it, you’ll get the hang of it quickly.
Let’s define a rule together.
First, we’ll create a rule that inserts a line break tag [r] at the end of sentences.
Click “Add”, name the rule “Line Break”, and save it.
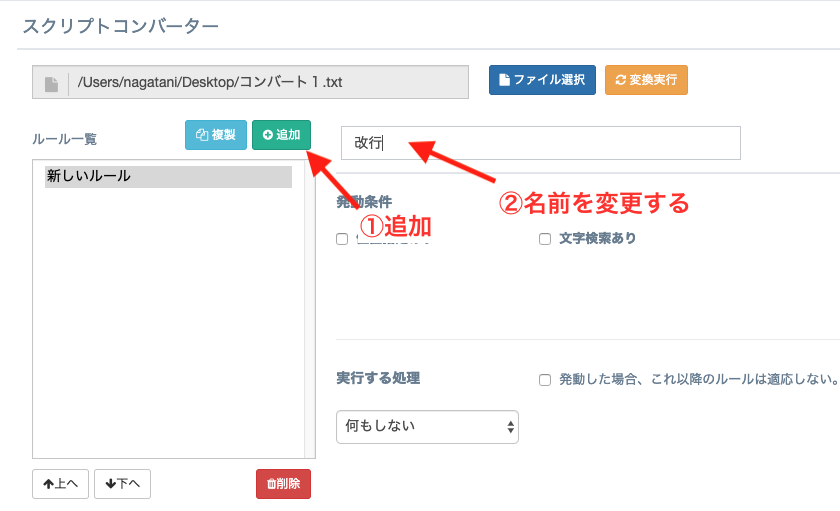
Set the trigger conditions.
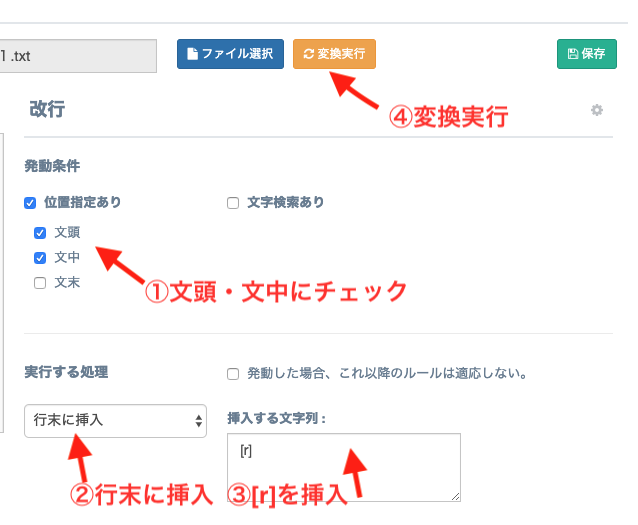
The converter processes one line at a time. Since we want to insert line breaks mid-sentence, check "Specify Position" and check both "Start of Line" and "Middle of Line".
Next, in the action section, select “Insert at End of Line” and enter “[r]” as the string to insert.
Finally, click “Execute Conversion”.
Now let's execute it. Here are the results:
You’ll see [r] has been inserted at the end of the lines.
Let’s explain the meaning of the line position options: “Start”, “Middle”, and “End”.
					I am a cat. (Start)

					I don't have a name yet. (End)


					;This is a comment. (Start)

					I have no idea where I was born. (Middle)

					All I remember is meowing... (Middle)

					I saw a human being. (End)
A new paragraph = “Start”
Last line of the paragraph = “End”
Lines in between = “Middle”
So the earlier rule inserts [r] at the end of “Start” and “Middle” lines.
Now let’s make a rule to insert [p] (click-to-continue) at “End” lines.

After running the conversion, [p] has been added at the end of sentences.
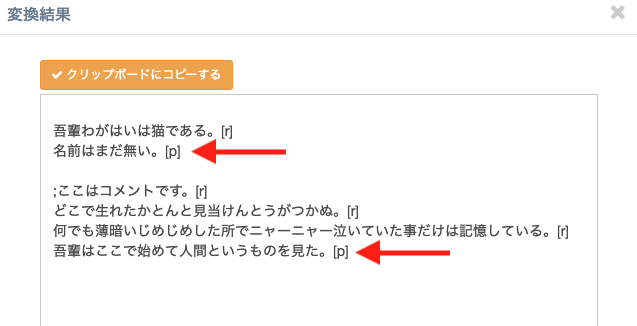
Successfully converted!
*Note: Single-line sentences are classified as “End”.
Next, let’s handle comments such as:
;This is a comment.
You probably don’t want these to be altered. So let’s add a rule to leave them unchanged:
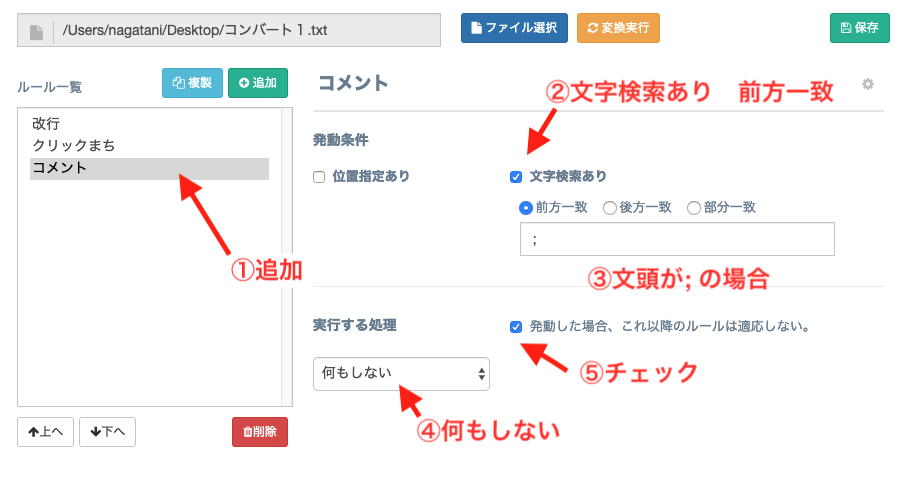
Now run the conversion.

Hmm? It still got converted…
That’s because the rules are applied in top-down order.
Use the arrow button to move this rule to the top.
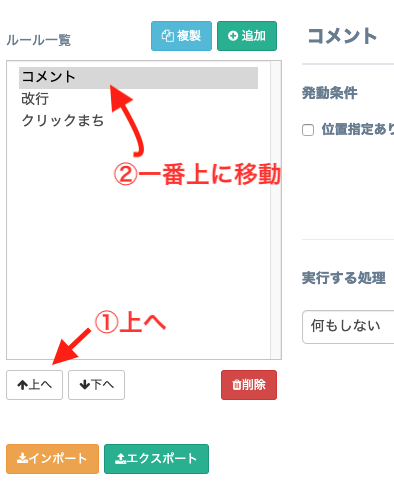
This ensures the comment rule is checked first.
Also, make sure “Do not apply further rules if this one matches” is checked.
Execute the conversion again:
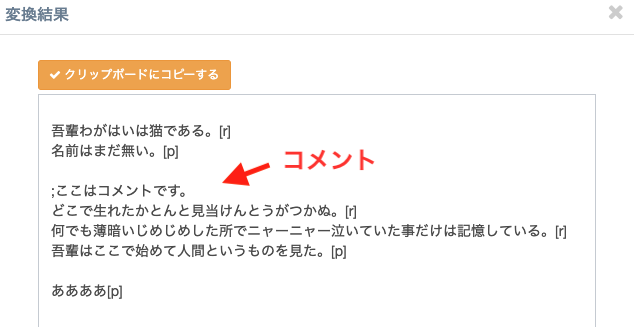
Comment lines are now preserved. Success!
By combining various rules, you can create a powerful automated conversion system.
Lastly, let’s look at a way to auto-generate tags, for example for facial expressions:
Input: 表情:Akane:Smile
Output: [chara_mod name="Akane" face="Smile"]
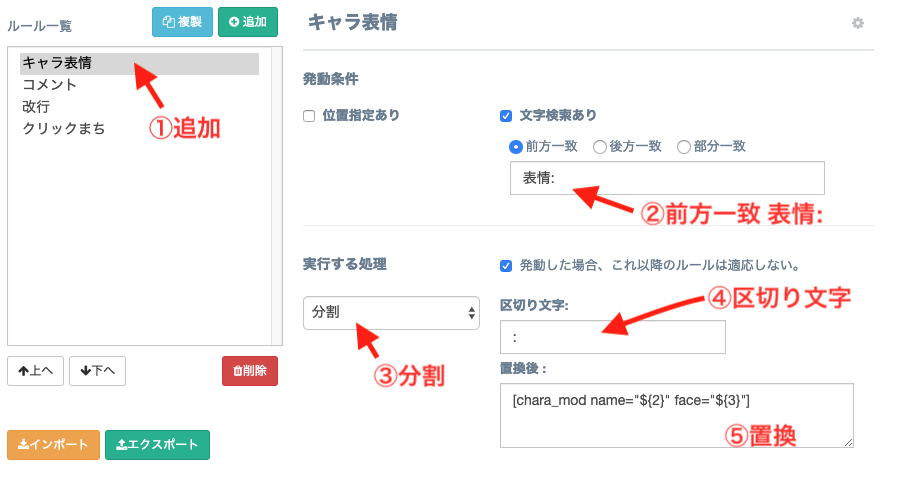
This rule uses the “Split” option to break text into parts using a delimiter.
For “表情:Akane:Smile”, the system assigns:
${1} = 表情
${2} = Akane
${3} = Smile
Then uses:
[chara_mod name="${2}" face="${3}"]
Final output:
[chara_mod name="Akane" face="Smile"]
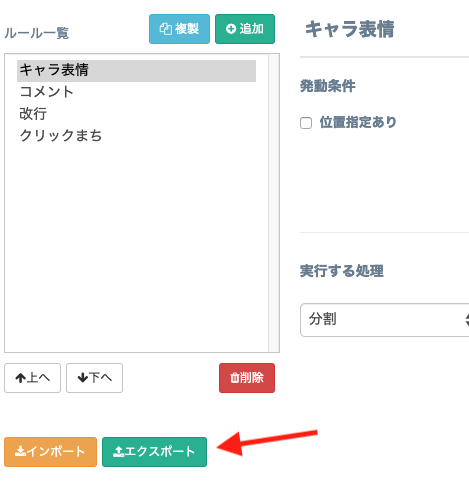
Sharing and Exporting Rules
If you create useful rules, feel free to share them!
Use the “Import” and “Export” buttons at the bottom left to transfer rule sets between environments.
Rule files can be freely distributed.
>> Next: Chat Novel Maker
Support Sites
Contact Us
Email: shikemokumk@gmail.com
2016 © STRIKEWORKS All Rights Reserved.