
Diving Deeper into Character Control
Let’s take a closer look at the character-related tags.
Here is the sample we will be creating in this section.
Sample Screen:
TyranoScript includes a wide range of built-in functions for controlling characters,
which are essential for visual novel creation. Here are the main tags used for character control:
- [chara_config] – Basic settings for character display
- [chara_new] – Define a new character
- [chara_show] – Display the defined character
- [chara_hide] – Hide a displayed character
- [chara_mod] – Change a character’s image (e.g., facial expression)
- [chara_delete] – Delete the character definition
Before displaying characters, you first need to define them. Please look at the following code:
;Register character Akane
[chara_new name="akane" storage="akane1.png" jname="Akane"]
;Register character Yamato
[chara_new name="yamato" storage="yamato1.png" jname="Yamato"]
In this example, we defined two characters: “akane” and “yamato.” At this stage, no characters have appeared on screen yet.
After defining them, you can use commands to display them on screen.
The `jname` attribute sets the character’s name in Japanese (or any preferred display name).
;Register character Akane
[chara_new name="akane" storage="akane1.png" jname="Akane"]
;Register character Yamato
[chara_new name="yamato" storage="yamato1.png" jname="Yamato"]

;Display character Akane
[chara_show name="akane"]
;Display character Yamato
[chara_show name="yamato"]
How is it? It’s simple and easy to understand.
The character positions are automatically calculated based on how many are displayed.
Displaying Character Names
As it is, it’s hard to tell who is speaking, right?
Let’s display the name of the character who is currently speaking.
First, define an area where the character’s name will be shown:
[ptext name="chara_name_area" layer=message0 width="200" color=white x=40 y=300 size=26]
Next, you’ll declare that this [ptext] will be used to show the speaking character’s name:
[ptext name="chara_name_area" layer=message0 width="200" color=white x=40 y=300 size=26]


[chara_config ptext="chara_name_area"]
Now the [ptext] declared earlier is ready to display character names. Let’s run the following script:
#akane
Nice to meet you. I’m Akane.[l][cm]
#yamato
Hello. I’m Yamato. [l][cm]
Output:
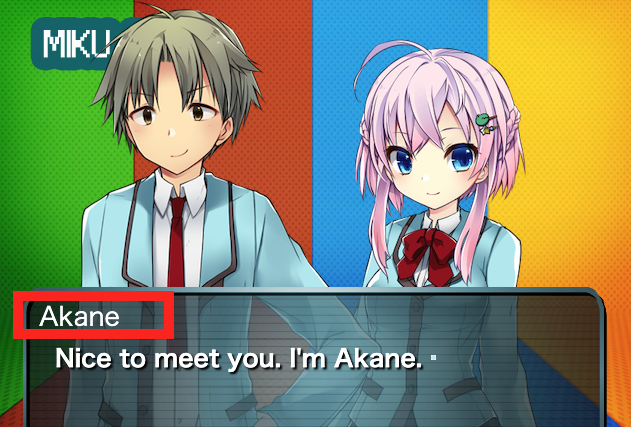
By using #character_name, the display name (jname) specified in [chara_new] will appear in the [ptext] area.
To hide the name display, simply write # by itself.
Registering Character Expressions
It can be tedious to specify a different image every time you want to change a character's expression.
If you pre-register a set of facial expressions, you can switch expressions just by specifying them.
; Register facial expression
[chara_face name="yuko" face="angry" storage="newface.png"]

; Apply the expression
[chara_mod name="yuko" face="angry"]

; Change both expression and speaker name
[chara_ptext name="yuko" face="angry"]

; Shortcut syntax. The following line means the same
#yuko:angry

; The image registered in [chara_new] can be called with the name "default"
#yuko:default
Summary
So, what do you think? In addition to what we covered, there are other functions like hiding characters and changing facial expressions.
They’re just as easy to use—simply specify the character’s name attribute that you defined earlier.
Here’s a sample that includes all of the above. Feel free to use it as a reference.
@wait time=1000

[title name="Character Tag Sample"]

@hidemenubutton

; Adjust message window size

; Load useful plugins for visual novels
[call target=*start storage="tyrano.ks"]

; Adjust text speed
[delay speed=30]

; Temporarily hide the message window
@layopt layer=message0 page=fore visible=false
@layopt layer=message0 page=back visible=false

; Show background
[bg storage="stage.jpg" ]

; Set ptext area for displaying character names
[ptext name="chara_name_area" layer=message0 width="200" color=white x=40 y=300 size=26]

; Position message box at the bottom and set frame image
[position  height=200 top=280 ]
[position layer=message0 page=fore frame="frame.png" margint="50" marginl="30" marginr="40" marginb="30"]
[cm]

; Show message layer
@layopt layer=message0 visible=true

[chara_config ptext="chara_name_area"]

[chara_new name="akane" storage="akane1.png" jname="Akane"]
[chara_new name="yamato" storage="yamato1.png" jname="Yamato"]
Now displaying characters[l][r][cm]
[chara_show name="akane"]
[chara_show name="yamato"]

#akane
Nice to meet you. I’m Akane[l][cm]
#yamato
Hi, I’m Yamato. [l][cm]
I'm going to exit now[l][cm]
[chara_hide name=yamato]

#akane
Looks like Yamato is gone.[l][cm]

#akane
I'll disappear too[l][cm]
[chara_hide name=akane]

; Writing just # hides the name display
#
No one’s left now.[l][cm]
Akane is back on screen[l][cm]

[chara_show name="akane"]

Now changing facial expression[l][cm]

[chara_mod name="akane" storage="akane2.png"]

[l]

That concludes the sample.

[s]
Support Sites
Contact Us
Email: shikemokumk@gmail.com
2016 © STRIKEWORKS All Rights Reserved.